
You have a K type thermocouple and a multimeter, but the reading looks wrong or you are not sure if the probe is still good. Maybe your project is showing room temperature when the probe is in a hot oven, or the numbers jump around.
This post walks you through the voltage and continuity tests you can do with a basic multimeter, explains what the millivolt reading means, and covers the mistakes that give false results. By the end, you will know whether your thermocouple is working or needs replacement.
How do I check a K type thermocouple with a multimeter?
To check a K type thermocouple with a multimeter, set it to millivolt DC and measure the voltage across the two wires while heating the probe. A good thermocouple will show a small voltage that rises with temperature. Also check continuity to rule out breaks. Compare the reading to a thermocouple table to estimate temperature.
What does a K type thermocouple actually output?

A K type thermocouple outputs a small DC voltage that changes with temperature. At room temperature, the output is only a few millivolts, and it increases as the probe gets hotter. This voltage is called the Seebeck effect and is generated by the junction of two different metals.
For a K type thermocouple, the voltage is roughly 41 microvolts per degree Celsius (41 µV/°C). That means at 100°C, the output is about 4.1 millivolts. Because the voltage is so small, you need a multimeter with a millivolt DC range, usually marked as mV or 200mV.
The thermocouple also has a cold junction where the wires connect to your multimeter or extension wire. The multimeter measures the difference between the hot junction and the cold junction, so the actual temperature is the hot junction temperature minus the cold junction temperature. For accurate readings, you need to compensate for the cold junction, but for a simple check, you can ignore it if the cold junction is at room temperature.
Which multimeter setting do you use to test it?
Set your multimeter to the millivolt DC range. This is usually marked as mV with a straight line or DC symbol. If your multimeter has auto-ranging, select the lowest DC voltage range. Do not use the resistance or continuity mode for this test, as that will not measure the thermocouple output.
For the continuity test, you will switch to continuity mode (often a diode or sound symbol). This mode checks if there is a complete electrical path between the two wires.
Make sure your multimeter probes are in the correct sockets: black probe in COM, red probe in the VΩmA socket. If you are using a cheap multimeter, the millivolt range may be labelled 200mV or 2V. Choose the range that gives the best resolution.
How do you read the millivolt output and convert it to temperature?
Connect the multimeter probes to the two thermocouple wires. Polarity matters: the red wire is usually the positive leg (chromel) and the other wire is negative (alumel). If you swap them, you will get a negative reading, but that is not harmful.
Heat the probe gently. You can use a cup of hot water (not boiling, to avoid steam) or a lighter held near the tip for a few seconds. Watch the multimeter display. A good thermocouple will show a voltage that increases as the probe warms. For example, at room temperature (around 25°C), you might see about 1.0 mV. In hot water near 100°C, you should see around 4.1 mV.
To convert the millivolt reading to temperature, use a K type thermocouple table or the approximate formula: temperature (°C) ≈ voltage (mV) / 0.041. This gives a rough estimate. For accurate results, use a proper thermocouple amplifier like the MAX6675, which does the cold-junction compensation and gives a digital reading.
Remember that the multimeter itself has a cold junction at its terminals. If the multimeter is at room temperature, the reading corresponds to the temperature difference between the probe tip and the multimeter. For a quick check, this is fine, but for precise measurement, use a thermocouple meter or module.
How do you check the probe is not broken or shorted?
Set your multimeter to continuity mode. Touch one probe to each thermocouple wire. A good thermocouple should show continuity (a beep or a reading near zero ohms) because the junction is a low-resistance path. If there is no continuity, the probe is broken inside, and you need to replace it.
Next, check for a short to the sheath. If your thermocouple has a metal sheath or stainless steel probe, touch one probe to the sheath and the other to each wire in turn. There should be no continuity (no beep) between the sheath and either wire. If you get continuity, the insulation has failed, and the probe is shorted to ground, which will give false readings.
Also inspect the wires for cuts, kinks, or burnt spots. A damaged wire can cause intermittent readings. If the probe is a bare-wire type, make sure the two wires are not touching each other except at the welded tip. A short between the wires will give a near-zero voltage.
Why does the reading jump around or show zero?
A jumping reading usually means a loose connection, a broken wire, or electrical noise. Check that the multimeter probes are firmly connected to the thermocouple wires. If you are using a breadboard or terminal block, tighten the screws. A zero reading often means the two wires are shorted together, or the multimeter is on the wrong range.
Another common cause is a ground loop. If the thermocouple sheath is touching a metal surface that is also connected to earth ground, and your multimeter is grounded, you can get a short. Try isolating the probe from metal parts.
If the reading is stuck at zero even when heated, the thermocouple junction may be broken. Test continuity as described above. If there is no continuity, replace the probe.
Electrical noise from motors or heaters can also cause fluctuations. Keep the thermocouple wires away from power cables, and use twisted pair or shielded wire if needed.
How do you test a thermocouple without a thermocouple meter?
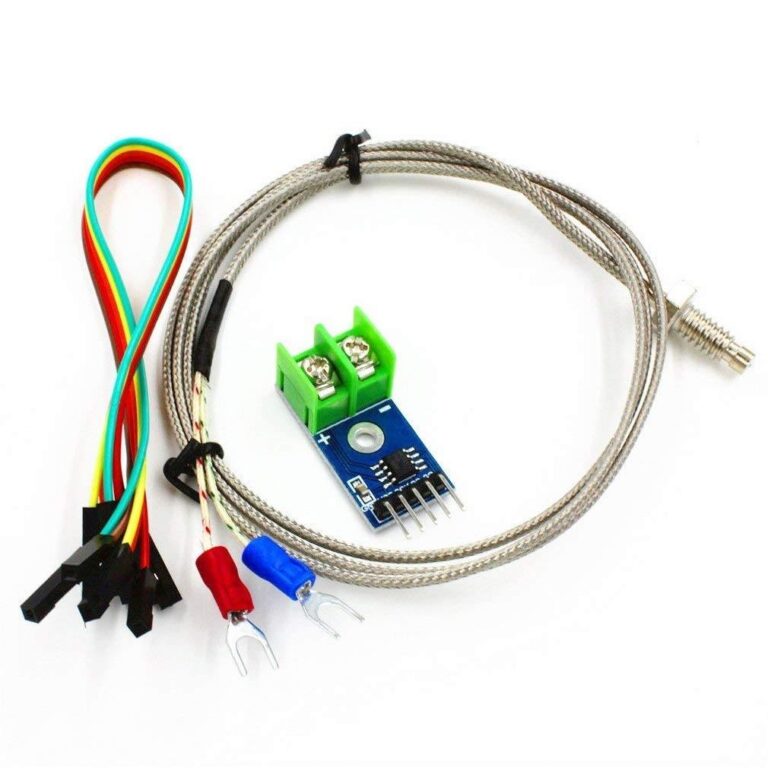
You can use a multimeter as described, but for a more practical test, you can use a thermocouple amplifier module like the MAX6675. This module converts the tiny voltage to a digital signal that you can read with a microcontroller like Arduino. It includes cold-junction compensation, so you get a direct temperature reading.
Connect the thermocouple to the MAX6675 module, and the module to an Arduino. Upload a simple sketch to read the temperature over SPI. If the temperature matches the expected value (room temperature when idle, rising when heated), the thermocouple is working.
We stock the MAX6675 Module with K Type Thermocouple Sensor and the Arduino Nano V3 Board Type-C (Pre-Soldered) for this kind of project. You can also use a dedicated thermocouple meter if you have one, but a multimeter and a known temperature source (like boiling water) can give you a good idea.
When should you replace the probe instead of the wiring?
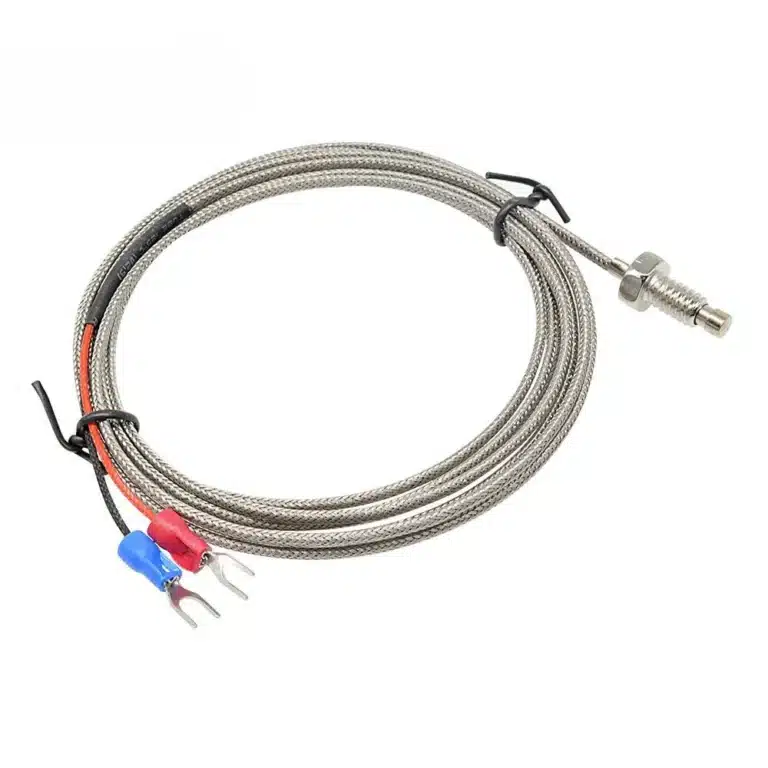
If the continuity test shows an open circuit (no beep) or a short to the sheath, the probe is faulty and should be replaced. If the wires are damaged but the probe itself is fine, you can sometimes repair the wiring, but thermocouple wires are made of special alloys, so any repair must use the same type of wire. A poor splice will create a new junction and cause errors.
If the probe passes continuity and insulation tests but the voltage output is erratic or does not change with temperature, the junction may be contaminated or oxidized. In that case, replacement is the reliable option.
For most students and makers, a new thermocouple is inexpensive. We sell the K Type Thermocouple for Rs. 250, and the PT100 Thermocouple K-Type Temperature Probe 0-800°C (0.5 meter) for Rs. 350. Both are in stock and ready for nationwide delivery.
What is the difference between a K type thermocouple and a PT100 sensor?
A K type thermocouple generates a voltage and has a wide temperature range, typically -200°C to 1372°C. A PT100 is a resistance temperature detector (RTD) that changes resistance with temperature and usually covers -200°C to 600°C with high accuracy. Thermocouples are cheaper and more rugged for high temperatures, while PT100 sensors are more stable and precise at lower temperatures.
For most hobby and student projects, a K type thermocouple with a MAX6675 module is a practical choice. If you need better accuracy around room temperature, a PT100 might be better, but it requires a different amplifier circuit.
Where to buy a K type thermocouple in Pakistan
We stock K type thermocouples and related modules at College Road Electronics in Rawalpindi. You can order online from our Boards, Modules and Accessories category, and we deliver nationwide across Pakistan with flat-rate shipping of Rs. 350.
If you are unsure which thermocouple suits your project, contact us and we will help you choose. We also carry the MAX6675 module, Arduino boards, and other accessories you might need for your temperature sensing project.
Frequently asked questions
What is a K type thermocouple?
A K type thermocouple is a temperature sensor made of two different metal wires joined at one end. It produces a small voltage that changes with temperature. It is popular because it is cheap, rugged, and works over a wide range from -200°C to 1372°C.
What is a K type thermocouple used for?
It is used to measure temperature in ovens, furnaces, kilns, engines, and industrial processes. Students and makers use it with Arduino and other microcontrollers for projects like temperature data logging, soldering iron controllers, and kiln monitoring.
How do I check a K type thermocouple with a multimeter?
Set your multimeter to millivolt DC. Connect the probes to the two thermocouple wires and heat the probe gently. A good thermocouple will show a small voltage that rises with temperature, roughly 0.041 mV per °C. Also check continuity to ensure the junction is not broken.
What is the difference between a K type thermocouple and a PT100 sensor?
A K type thermocouple generates a voltage and handles higher temperatures up to 1372°C. A PT100 is a resistance sensor that is more accurate and stable at lower temperatures, typically up to 600°C. Thermocouples are cheaper and more rugged for high-heat applications.
Why does my thermocouple read zero on the multimeter?
A zero reading usually means the two wires are shorted together, the multimeter is on the wrong range, or the thermocouple junction is broken. Check continuity and inspect the wires for damage. If the junction is open, replace the probe.
What is the K type thermocouple price in Pakistan?
At College Road Electronics, the K Type Thermocouple is priced at Rs. 250. We also offer a K-type temperature probe for Rs. 350 and a MAX6675 module with thermocouple for Rs. 800. All are in stock and available for nationwide delivery.
