
You have built a lithium battery pack from 18650 cells or bought a ready-made pack, and now you need to protect it. A BMS board is the small circuit that keeps the pack from overcharging, over-discharging, or shorting out. Without one, your cells can be damaged or worse.
This guide walks you through choosing the correct BMS for your pack by cell count, current, and chemistry, then shows you the wiring order that prevents the most common failures. We use real modules available in Pakistan so you can follow along with parts you can actually buy.
How do I choose and wire a BMS for lithium battery packs?
Choose a BMS for lithium battery by matching cell count (2S, 3S, 4S), continuous current above your load, and chemistry (Li-ion or LiFePO4). Wire it by connecting the balance leads first, then the main negative, and finally the charger and load. Always test with a multimeter before connecting a load.
What does a BMS actually do in a lithium battery pack?
A BMS (Battery Management System) protects the cells from damage and keeps them balanced. It monitors cell voltages and cuts off charging or discharging when limits are reached.
Specifically, a BMS for lithium battery performs these jobs:
- Overcharge protection: Stops charging when any cell reaches about 4.25V (for Li-ion).
- Over-discharge protection: Disconnects the load when a cell drops to about 2.7V.
- Overcurrent and short-circuit protection: Cuts power if the current exceeds safe limits.
- Cell balancing: Bleeds small amounts of current from higher-voltage cells so all cells stay equal.
Without a BMS, a single cell can be overcharged or over-discharged, leading to capacity loss, swelling, or fire. For any DIY lithium pack, a BMS is not optional.
How do you pick the right BMS for 1S, 2S, 3S or 4S packs?

Match the BMS to your pack’s cell count and chemistry. The cell count (S rating) must match exactly: a 3S BMS will not work on a 4S pack.
Here is a quick reference for common lithium packs:
| Pack | Nominal Voltage | Full Charge | Example BMS |
|---|---|---|---|
| 2S | 7.4V | 8.4V | 2S 7.4V 3A Li-Ion Cell BMS Charging Protection Module |
| 3S | 11.1V | 12.6V | 3S 11.1V 10A Li-Ion Cell BMS Charging Protection Module |
| 3S | 11.1V | 12.6V | 3S 12.6V 20A Li-Ion Cell BMS Charging Protection Module |
| 4S | 14.8V | 16.8V | 4S 16.8V 40A Li-Ion Cell BMS Charging Protection Module |
For LiFePO4 cells, the voltage limits differ (typically 3.65V full, 2.5V empty), so use a BMS designed for LiFePO4. Most hobby BMS modules are for Li-ion/Li-Po. If you are unsure, check the product description or ask before buying.
Also consider the physical size: larger current ratings mean bigger heatsinks and terminals. Make sure it fits your enclosure.
How much continuous current does your BMS need?

Choose a BMS with a continuous current rating at least 20–30% higher than your maximum expected load current. This margin prevents nuisance tripping and keeps the BMS cool.
To estimate your load current, add up the current draw of all devices that will run from the pack. For example, a robot with four motors that draw 2A each at stall needs at least 8A, so a 10A BMS is marginal; a 20A BMS gives headroom.
Remember that BMS current ratings are often optimistic and depend on cooling. If your BMS gets hot during use, either reduce the load or add airflow. For high-power projects like e-bikes or large inverters, consider a BMS with a heatsink or active cooling.
Also check the peak current cutoff: it should be higher than your startup surge. The 3S 12.6V 20A Li-Ion Cell BMS Charging Protection Module has a peak cutoff around 25–30A, which suits many medium-power applications.
How do you wire a BMS to your battery pack step by step?
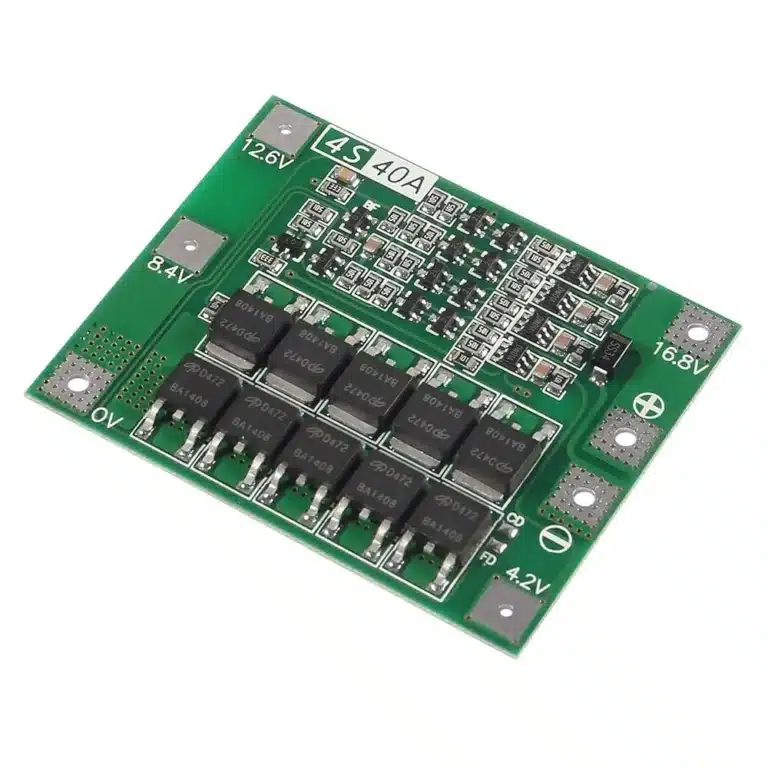
Wire the BMS in this order: balance leads first, then the main negative, then the charger and load. This sequence prevents short circuits and ensures the BMS sees correct cell voltages from the start.
Here is the step-by-step process. Work on a non-conductive surface and use insulated tools.
- Identify BMS pads: Locate B- (battery negative), P- (pack negative, for load/charger), and the balance pads labeled B1, B2, B3, etc. The number of balance pads equals the number of cells.
- Connect balance leads: Solder a wire from the negative terminal of cell 1 to B1, cell 2 positive to B2, and so on. The last balance lead goes to the positive terminal of the last cell. Double-check each connection with a multimeter: measure voltage between adjacent balance pads; each should read about 3.7V for Li-ion.
- Connect B-: Solder a thick wire from the battery pack negative (the same point as cell 1 negative) to the B- pad on the BMS.
- Connect P-: Solder a thick wire from the P- pad to your load negative and charger negative. The load positive and charger positive connect directly to the battery pack positive.
- Insulate and secure: Use heat-shrink tubing or electrical tape to cover exposed pads. Mount the BMS so it cannot short against the cells.
Always use wires rated for the current. For 10A, use at least 18 AWG; for 20A, use 16 AWG or thicker.
What is the difference between a protected and unprotected BMS?
A protected BMS includes overcharge, over-discharge, overcurrent, and short-circuit protection. An unprotected BMS (sometimes called a balancing board) only balances cells and does not cut off current.
For DIY packs, always choose a protected BMS unless you have a separate protection circuit. Unprotected boards are cheaper but leave your cells vulnerable. Most BMS modules sold for hobby use are protected.
Some BMS boards also include a temperature sensor input. If your BMS has one, attach the sensor to the cells to enable temperature-based cutoff. This is useful in Pakistan’s hot summers, where packs can get quite warm during fast charging or heavy load.
Which mistakes destroy a BMS or the cells?
The most common mistakes are reversing polarity, connecting the balance leads in the wrong order, and using a BMS with too low a current rating. These can instantly kill the BMS or damage cells.
- Reverse polarity: Connecting B- and P- backwards will short the BMS. Always double-check with a multimeter before soldering.
- Wrong balance lead order: If balance leads are not in ascending voltage order, the BMS may see negative cell voltages and fail. Measure each cell voltage before connecting.
- No pre-charge: Connecting a load with large capacitors (like an inverter) can cause a huge inrush current that trips or damages the BMS. Use a pre-charge resistor or connect the load through a switch.
- Soldering heat: Overheating the BMS pads can lift them. Use a hot iron briefly, not a blowtorch.
- Mixing cells: Using cells of different capacities or ages in one pack causes imbalance and early cutoff. Use matched cells.
Also avoid charging below 0°C or above 45°C; many BMS boards do not include temperature protection, so you must monitor conditions yourself.
How do you test a BMS after wiring?
Test the BMS with a multimeter and a bench power supply before connecting your actual load. Start by checking voltages, then test cutoff functions.
- Check balance voltages: Measure between adjacent balance pads. Each should read within 0.05V of the others. If not, recheck your wiring.
- Check output voltage: With no load, measure between P- and battery positive. It should read the pack voltage (e.g., 11.1V for 3S).
- Test over-discharge: Connect a small load and monitor until the BMS cuts off. The cutoff should occur around 2.7V per cell (8.1V for 3S).
- Test overcharge: Use a adjustable power supply set to the full charge voltage (e.g., 12.6V for 3S) with current limit. The BMS should stop charging when any cell reaches 4.25V.
- Test short-circuit: Briefly short P- to positive through a small fuse or resistor. The BMS should cut off and recover after removing the short. Do this cautiously.
If the BMS does not behave as expected, disconnect and recheck wiring. Never proceed to full load until tests pass.
Which BMS modules are available in Pakistan for DIY projects?
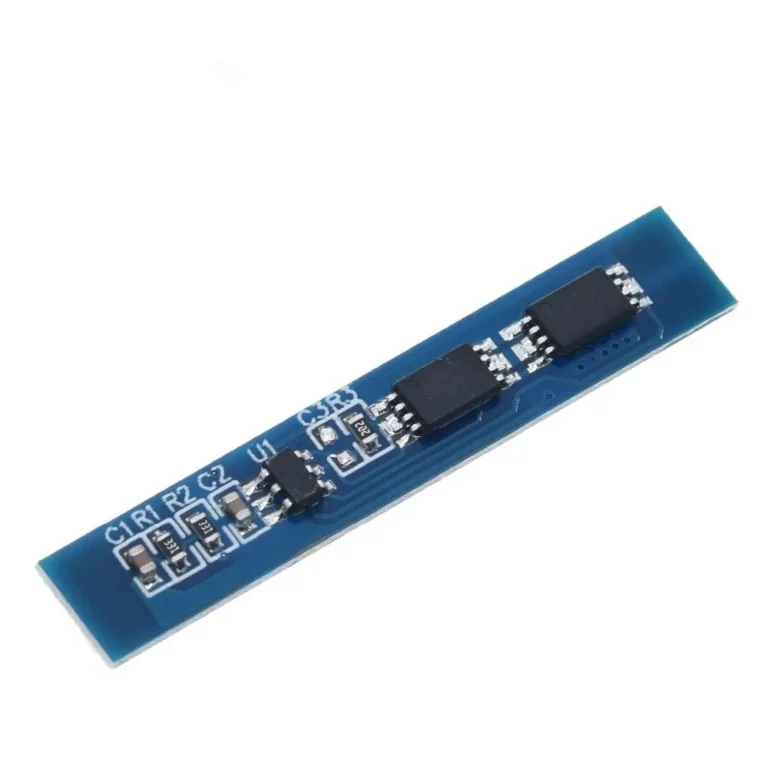
College Road Electronics stocks a range of BMS modules for lithium packs, from 2S to 4S and current ratings up to 40A. Prices start at Rs. 100.
Popular choices include:
- 2S 7.4V 3A Li-Ion Cell BMS Charging Protection Module (Rs. 100) for small robots and IoT devices.
- 3S 11.1V 10A Li-Ion Cell BMS Charging Protection Module (Rs. 150) for LED lighting and portable electronics.
- 3S 12V 10A Li-Ion Cell BMS Charging Protection Module (Rs. 220) with balance function.
- 3S 12.6V 20A Li-Ion Cell BMS Charging Protection Module (Rs. 250) for e-bikes and robotics.
- 4S 16.8V 40A Li-Ion Cell BMS Charging Protection Module (Rs. 450) for solar storage and high-power projects.
Browse the full BMS Modules and Accessories category to see all options. For cells and chargers, check the Batteries and Accessories category.
Frequently asked questions
How do I choose a BMS for a lithium ion battery pack for my project?
Match the BMS to your pack’s cell count (2S, 3S, 4S), chemistry (Li-ion or LiFePO4), and continuous current. Choose a current rating at least 20–30% above your maximum load. Ensure it has protection features and balancing. For example, a 3S 10A BMS suits a small robot, while a 4S 40A BMS suits a solar storage project.
How do I connect solar panels, a battery and a BMS module together safely?
Connect the solar panel to a charge controller, then the controller to the battery through the BMS. The BMS P- connects to the controller’s battery negative, and the battery positive goes directly to the controller. Always connect the BMS to the battery first, then the controller, and use fuses on the solar input. Ensure the BMS current rating exceeds the charge current.
Can I use a 3S BMS on a 4S battery pack?
No. The BMS cell count must match the pack exactly. A 3S BMS expects three cells and will not balance or protect a 4S pack correctly. Using the wrong BMS can lead to overcharge or over-discharge of some cells, causing damage or fire.
What is the difference between a BMS and a charge controller?
A BMS protects and balances the battery cells, while a charge controller regulates charging from a solar panel or other source. In a solar setup, the charge controller manages the charging profile, and the BMS provides a final safety cutoff and cell balancing. Both are needed for a safe lithium battery system.
How do I test if my BMS is working?
Use a multimeter to check balance voltages (each cell within 0.05V), then test cutoff by discharging until the BMS disconnects (around 2.7V per cell). Test overcharge with a power supply set to full voltage. Also test short-circuit protection cautiously. If the BMS does not cut off, recheck wiring or replace the module.
What is the price of a BMS for lithium battery in Pakistan?
Prices start at Rs. 100 for a 2S 3A module and go up to Rs. 450 for a 4S 40A module. Higher current and more cells cost more. College Road Electronics stocks these modules and ships nationwide.
