Building your first robot is an exciting milestone, especially when it's a Line Follower Robot. These robots can automatically follow a path drawn on the floor using sensors and real-time decision-making. They are commonly used in robotics competitions, STEM education, and early autonomous vehicle concepts.
What is a Line Follower Robot?
A line follower robot is an autonomous robot that tracks and follows a high-contrast line (usually black on white or white on black) using Infrared (IR) sensors. By continuously reading the color contrast, the robot adjusts its direction to stay on track.
This simple concept introduces several important engineering principles:
- Closed-loop feedback control
- Sensor integration
- Differential motor control
- Real-time programming
How a Line Follower Robot Works
A line follower robot operates using four core elements:
- IR Sensors – These sensors detect contrast differences between a black track and a white background.
- Arduino UNO – Reads the sensor output and decides whether the robot should move left, right, or straight.
- Motor Driver (L298N / L293D) – Controls the speed and direction of the motors based on Arduino signals.
- DC Motors + Wheels – Create the motion to follow the line.
Basic Logic
- If the left sensor sees the line → turn left
- If the right sensor sees the line → turn right
- If both sensors see the same surface → move straight
This feedback loop runs many times per second, making the robot responsive and accurate.
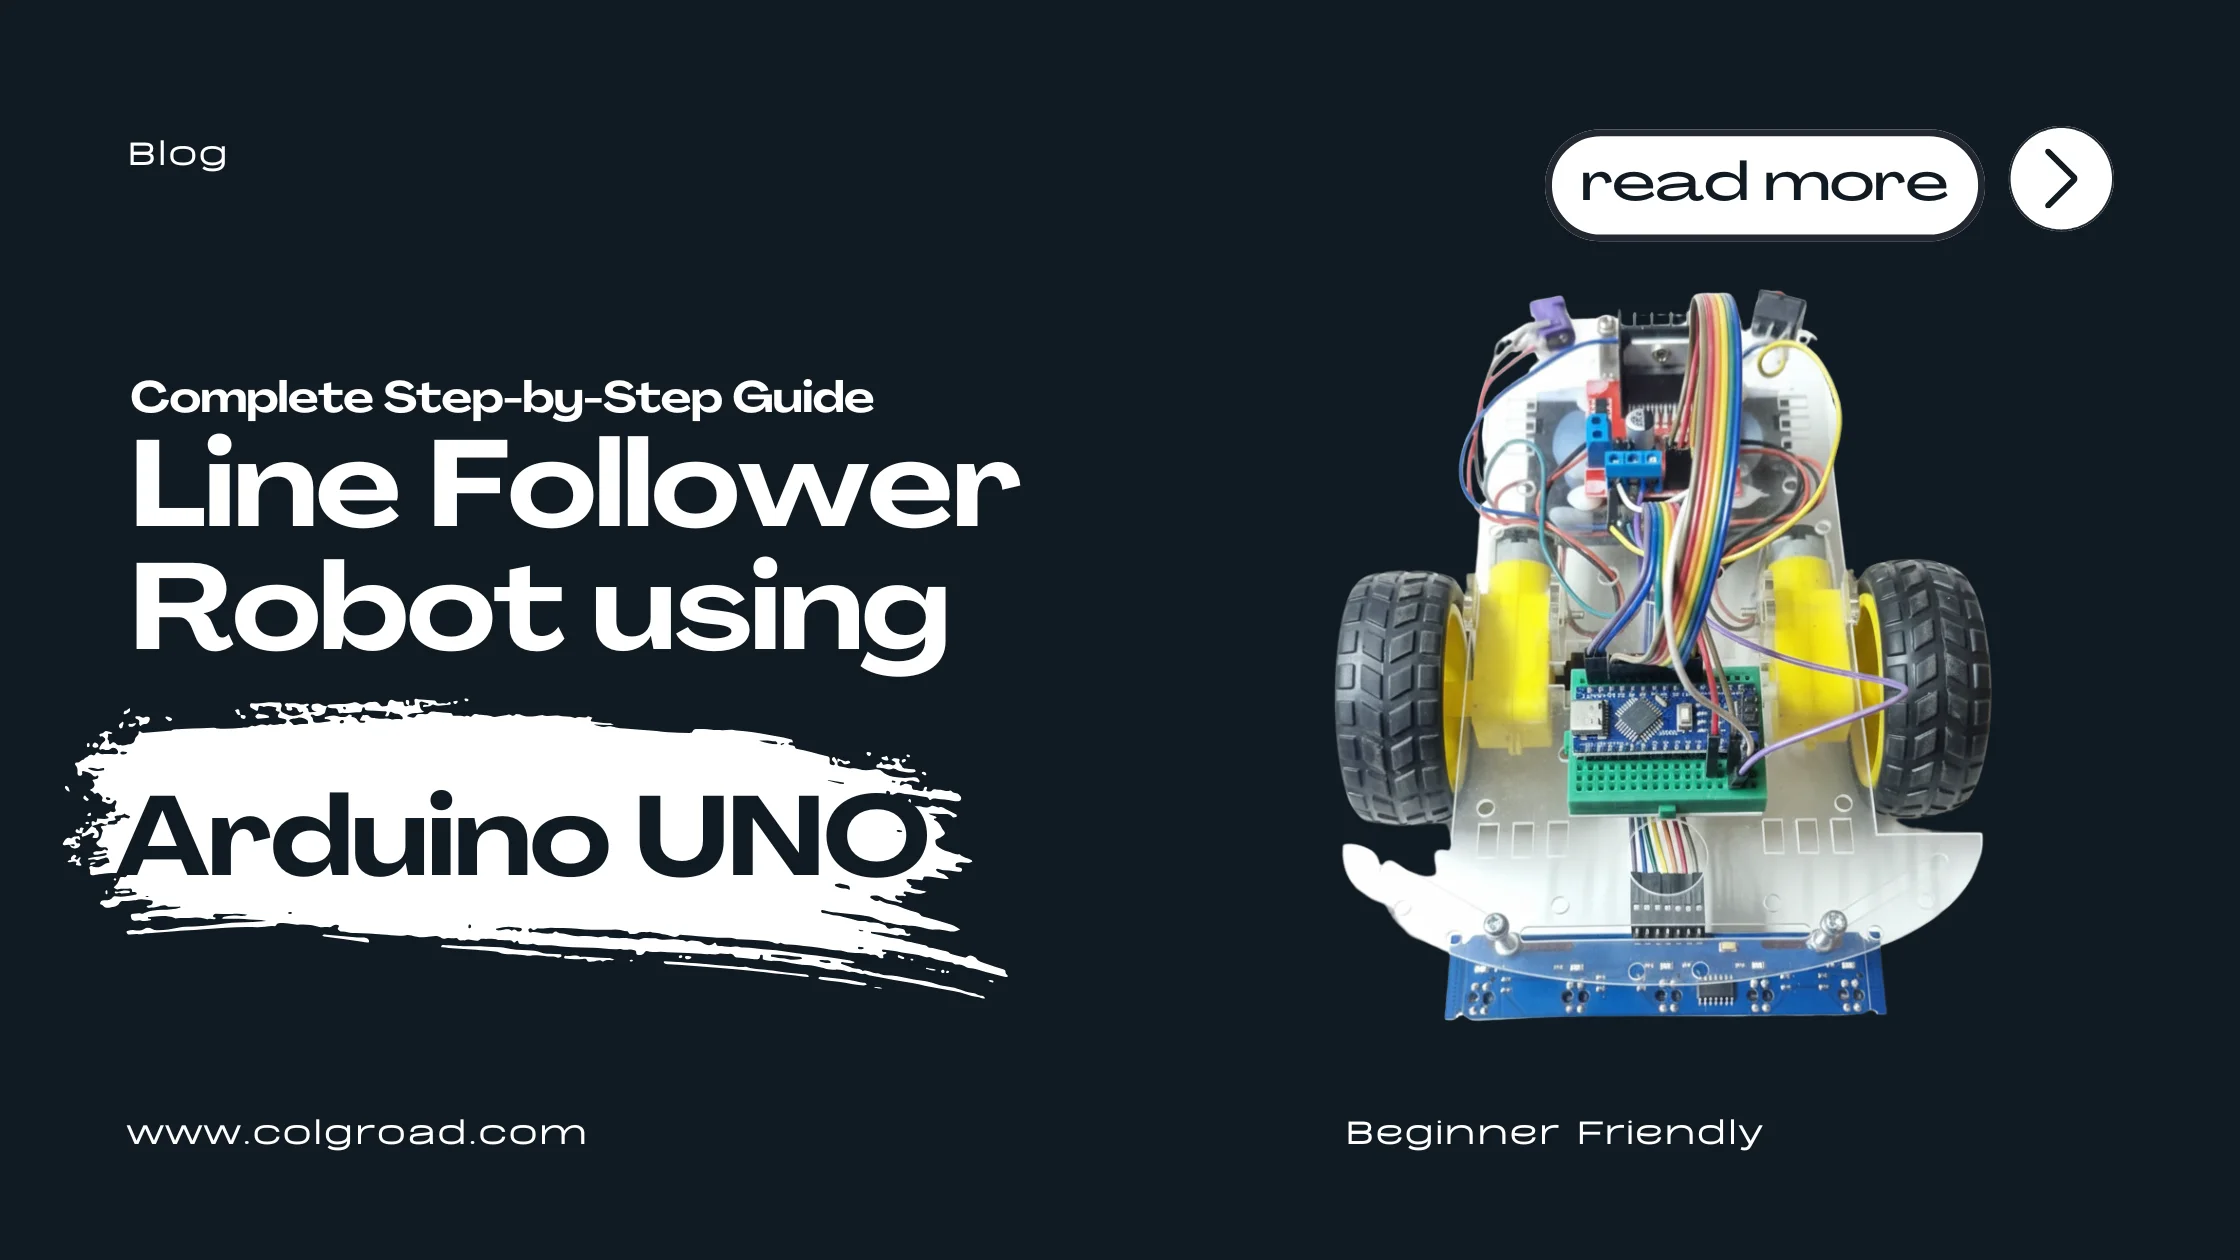
Components You Need
If you want all components in one place, this kit provides everything:
Recommended Kit: 2WD Arduino Line Following Robot (Unassembled)
➜ Get This Kit NowThis kit includes:
- Arduino UNO R3
- L298N motor driver
- Dual IR sensors
- 2 DC gear motors
- Wheels + caster
- Acrylic chassis
- Battery holder
- Jumper wires & hardware
- Example code
This saves you from sourcing parts separately and ensures compatibility.
Step-by-Step Guide: Build a Line Follower Robot with Arduino UNO
Step 1: Assemble the Chassis
- Attach the two DC motors to the acrylic base.
- Fix the wheels on both motors.
- Mount the caster wheel at the front or back.
- Install the battery holder.
Make sure everything is tightened properly to avoid wobbling.
Step 2: Mount the Arduino UNO and Motor Driver
- Use screws or standoffs to mount the Arduino UNO on the top plate.
- Place the L298N motor driver near the motors for easy wiring.
- Keep wires short for better performance and neat assembly.
Step 3: Install the IR Line Tracking Sensors
Place the dual IR sensors at the bottom front of the robot, around:
- 1 to 1.5 cm above the surface
- Parallel to the track
This height ensures accurate reflection detection.
Step 4: Wiring the Components
IR Sensors → Arduino
| IR Sensor Pin | Arduino Pin |
|---|---|
| VCC | 5V |
| GND | GND |
| Left Sensor | A0 |
| Right Sensor | A1 |
Motors → L298N
- Motor A → Left wheel
- Motor B → Right wheel
L298N → Arduino
| L298N Pin | Arduino Pin |
|---|---|
| IN1 | 9 |
| IN2 | 8 |
| IN3 | 7 |
| IN4 | 6 |
| ENA | 10 |
| ENB | 11 |
Connect the battery output to:
- +12V → L298N power
- GND → Arduino + L298N common ground
Step 5: Upload the Arduino Code
// Line Follower Robot - Basic sketch
int leftSensor  = A0;
int rightSensor = A1;

// Motor Pins
int in1 = 9;
int in2 = 8;
int in3 = 7;
int in4 = 6;
int ena = 10;
int enb = 11;

void setup() {
    pinMode(leftSensor, INPUT);
    pinMode(rightSensor, INPUT);
    pinMode(in1, OUTPUT);
    pinMode(in2, OUTPUT);
    pinMode(in3, OUTPUT);
    pinMode(in4, OUTPUT);
    pinMode(ena, OUTPUT);
    pinMode(enb, OUTPUT);

    analogWrite(ena, 150); // initial motor speed (0-255)
    analogWrite(enb, 150);
}

void loop() {
    int leftValue  = digitalRead(leftSensor);
    int rightValue = digitalRead(rightSensor);

    // Both sensors on white (or HIGH): move forward
    if (leftValue == HIGH && rightValue == HIGH) {
        forward();
    }
    // Left sees line (LOW) -> turn left
    else if (leftValue == LOW && rightValue == HIGH) {
        leftTurn();
    }
    // Right sees line (LOW) -> turn right
    else if (leftValue == HIGH && rightValue == LOW) {
        rightTurn();
    }
    // Both LOW or ambiguous -> stop or forward as fallback
    else {
        stopRobot();
    }
}

void forward() {
    digitalWrite(in1, HIGH);
    digitalWrite(in2, LOW);
    digitalWrite(in3, HIGH);
    digitalWrite(in4, LOW);
}

void leftTurn() {
    digitalWrite(in1, LOW);
    digitalWrite(in2, HIGH);
    digitalWrite(in3, HIGH);
    digitalWrite(in4, LOW);
}

void rightTurn() {
    digitalWrite(in1, HIGH);
    digitalWrite(in2, LOW);
    digitalWrite(in3, LOW);
    digitalWrite(in4, HIGH);
}

void stopRobot() {
    digitalWrite(in1, LOW);
    digitalWrite(in2, LOW);
    digitalWrite(in3, LOW);
    digitalWrite(in4, LOW);
}
Step 6: Test and Calibrate
- Test the robot on a strong contrast track (black electrical tape on white paper).
- If the robot drifts:
- Reduce or increase speed (PWM).
- Adjust sensor height.
- Tune thresholds in code (if using analog reads).
Calibration is crucial for smooth performance.
Why I Recommend This Kit for Beginners
2WD Arduino Line Following Robot (Unassembled)
➜ View Product DetailsReasons:
- Perfect for students, beginners, and robotics competitions
- Comes with all necessary components
- Fully customizable and expandable
- Helps you learn:
- Arduino programming
- IR sensors
- H-bridge motor control
- Differential steering
- Embedded systems concepts
The transparent acrylic chassis also makes wiring easier to understand visually.
Applications of a Line Follower Robot
- School and college robotics competitions
- STEM education and classroom labs
- DIY learning projects
- Autonomous navigation prototypes
- Arduino workshops
- Maker space robotics
Conclusion
Building a Line Follower Robot using Arduino UNO is one of the best ways to learn robotics, electronics, and embedded programming. With just a few core components and simple code, you'll have a working autonomous robot that follows a path on its own.
If you want a smooth, frustration-free experience, I strongly recommend using the ready hardware kit:
2WD Arduino Line Following Robot (Unassembled)
➜ Buy Now at Colgroad.comIt includes everything you need to start learning and experimenting right away.