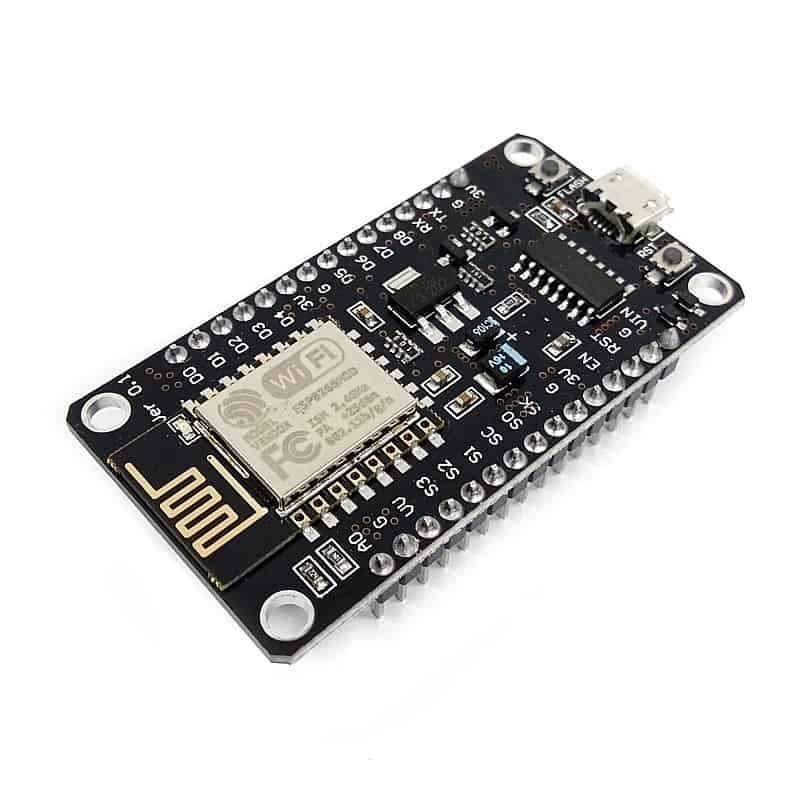

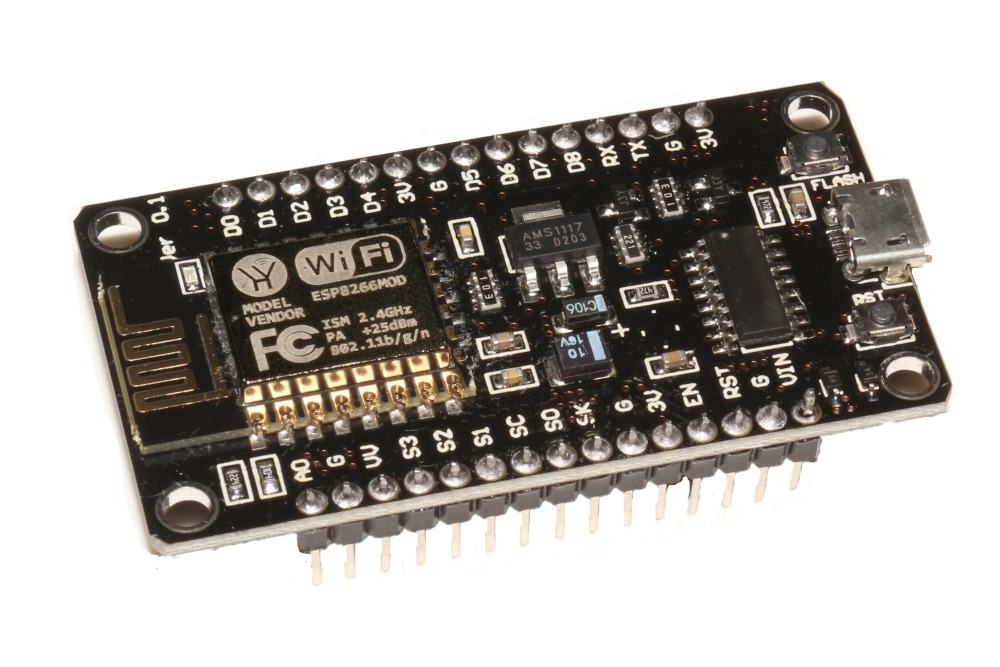
NodeMCU ESP8266 Wi-Fi Module V3 (CH340) – Overview
The NodeMCU ESP8266 Wi-Fi Module V3 with CH340 is a compact development board designed for IoT, home automation, and sensor-based projects. It combines the popular ESP8266 system-on-chip with a CH340 USB-to-UART bridge for easy USB programming and power. The board is breadboard-friendly and ready for rapid prototyping using the Arduino IDE or NodeMCU Lua firmware.
Why choose this ESP8266 Wi-Fi Module
This NodeMCU board is chosen by makers, students, and engineers for its low cost, wide software support, and reliable Wi-Fi connectivity. The CH340 USB interface simplifies setup on Windows, macOS, and Linux (CH340 driver may be required on some systems). With built-in Wi-Fi client, access point, and server modes, the module is ideal for connected devices and remote monitoring.
Key Features
- ESP8266 Wi-Fi System-on-Chip with 80/160 MHz CPU speed
- CH340 USB-to-serial chip for plug-and-play USB programming and power
- Breadboard-friendly 30-pin layout with female headers
- Onboard 3.3V regulator; micro USB power input (5V via USB regulated to 3.3V)
- Approximately 4MB flash memory (module-dependent)
- Interfaces: ADC (1), PWM, I2C, SPI, UART
- Supports Wi-Fi STA, AP, and Server modes for flexible connectivity
Technical Specifications
- SoC: Espressif ESP8266
- USB Interface: CH340 USB-to-UART bridge
- Operating Voltage: 3.3V (powered via micro USB and onboard regulator)
- Flash Memory: ~4MB (varies by module)
- GPIO: Multiple digital I/O pins with PWM, I2C, SPI, UART support
- Analog: 1 x ADC input
- Programming: Arduino IDE, NodeMCU/Lua firmware, or AT commands
Common Use Cases
- Home automation – control relays, lights, smart plugs and sensors over Wi-Fi
- IoT sensor nodes – send temperature, humidity, air quality or motion data to cloud services
- Prototyping – build Wi-Fi-enabled proof-of-concept devices quickly
- Education and learning – great for students and hobbyists using Arduino or Lua
- Remote monitoring and simple web servers for device control and diagnostics
Getting Started with NodeMCU ESP8266 V3
- Install CH340 drivers if your operating system requires them.
- Open Arduino IDE and select the board: NodeMCU 1.0 (ESP8266).
- Connect the board to your PC using a micro USB cable and select the correct COM port.
- Install ESP8266 boards package via Boards Manager and required libraries (WiFi, ESPAsyncWebServer, etc.).
- Upload a simple Wi-Fi example to connect to your network or run a small web server for testing.
Quick start tip
Enable OTA updates during development to update firmware wirelessly once the board is on the network.
Tips and Best Practices
- Always operate I/O at 3.3V – the GPIO pins are not 5V tolerant.
- Use proper level shifting when interfacing with 5V sensors or modules.
- If powering external peripherals, verify the board regulator can supply the required current or use a separate 3.3V supply.
- Keep power and ground connections short and use decoupling capacitors for stability where needed.
Compatibility and Community
The NodeMCU ESP8266 V3 is compatible with Arduino IDE, NodeMCU/Lua firmware, and many third-party libraries. A large community provides tutorials, sample projects, and libraries to accelerate development for IoT and home automation projects.
Conclusion
Whether you are building a connected sensor, a home automation controller, or learning embedded development, the NodeMCU ESP8266 Wi-Fi Module V3 with CH340 offers a strong balance of features, affordability, and community support to get your project online quickly.


Umar K. (verified owner) –
The prices are reasonable, the customer service feels truly luxurious, and the staff is always well-mannered. The products are high quality, making the overall experience excellent.
Umar K. –