Why a 4DOF robotic arm matters right now
Robotic arms are no longer confined to industrial factories. Compact, affordable, and educational robots are showing up in classrooms, makerspaces, and home workshops. A 4DOF robotic arm (four degrees of freedom) strikes a sweet spot: it’s simple enough for beginners to build and program, yet powerful enough to perform useful tasks like pick-and-place, basic assembly, and interactive demos.
What “4DOF” means in plain language
Degrees of freedom (DOF) refer to the independent ways a robot joint or link can move. A 4DOF robotic arm typically includes:
- Base rotation (yaw)
- Shoulder pitch
- Elbow pitch
- Wrist pitch or gripper actuation
This configuration allows the arm to reach most points in a hemisphere around its base and manipulate simple objects. While it can’t match the dexterity of a 6DOF industrial arm, a 4DOF arm is excellent for learning kinematics, control, and integration with microcontrollers.
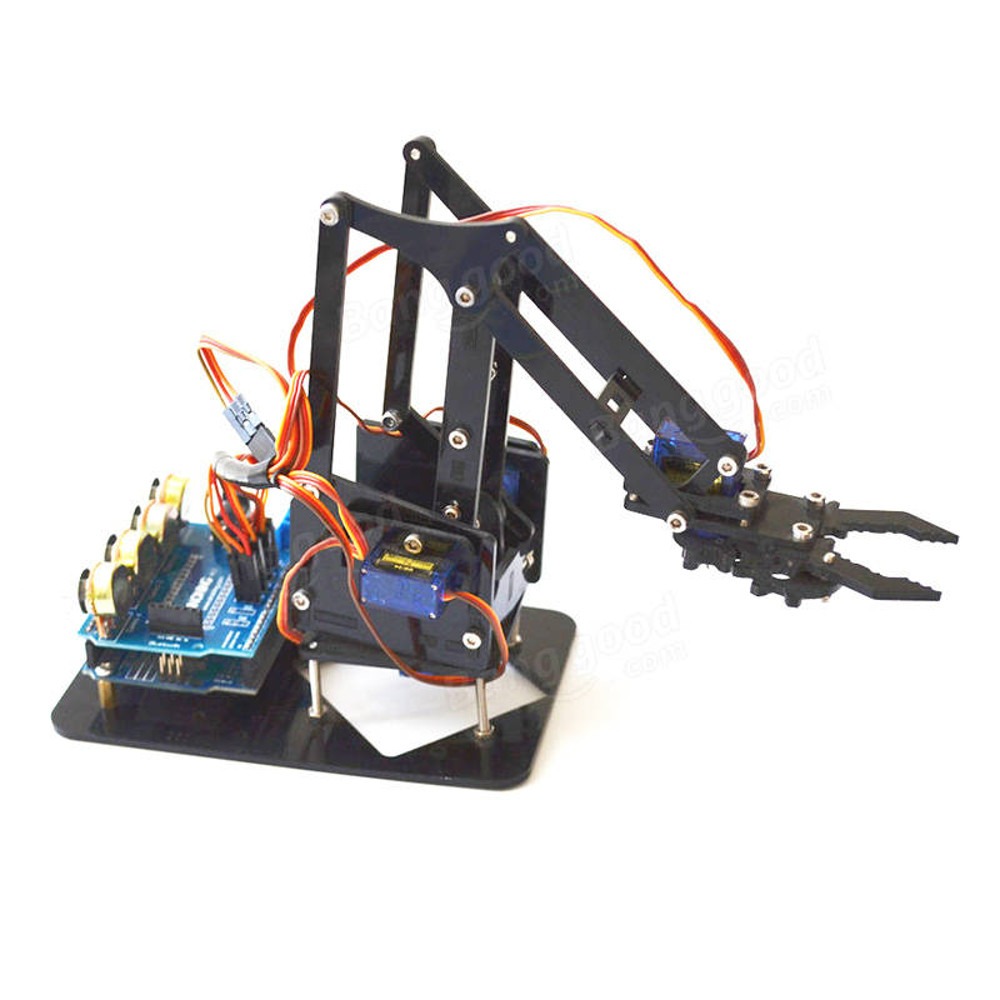
Key components of a 4DOF robotic arm
Building or buying a 4DOF robotic arm usually involves the following parts:
- Servomotors or stepper motors: common for hobby arms because they’re cheap and easy to control.
- Controller: Arduino, Raspberry Pi, or dedicated motor drivers.
- Structural parts: Aluminum or laser-cut acrylic frames.
- End effector: usually a simple gripper, suction cup, or tool mount.
- Power supply: A stable current for multiple servos is critical to avoid reset or jitter.
Common use cases
A 4DOF robotic arm is versatile for several low-to-medium complexity applications:
- Education: teach kinematics, control theory, and programming.
- Prototyping: proof-of-concept pick-and-place for small parts.
- Content creation: automate repetitive camera or prop movements.
- Hobbyist projects: game controllers, sculpture assistance, or desk automation.
According to open-source robot arm kit pages, these hands-on projects are popular in STEAM education because they combine mechanical design, electronics, and coding (source: open-source robot arm kit documentation).
How inverse kinematics works for a 4DOF robotic arm
Inverse kinematics (IK) converts a desired end-effector position into joint angles. For a 4DOF robotic arm the IK problem is simpler than for higher-DOF arms, but still requires understanding trigonometry and frame transforms. A typical approach:
- Define link lengths and joint limits.
- Project the target onto the arm’s working plane.
- Solve for shoulder and elbow angles using the law of cosines.
- Compute wrist or gripper orientation if required.
Many tutorials walk through this step-by-step and provide ready-made libraries for Arduino or Python (source: inverse kinematics tutorials and community code repositories).
Control strategies: simple to advanced
Start with direct servo angle commands, then progress to feedback and path planning:
- Open-loop control: send angles to servos. Easy, but no error correction.
- Closed-loop control: add sensors (potentiometers, encoders) or use IMUs for more accurate motion.
- Trajectory planning: interpolate joint angles to create smooth movements and avoid abrupt servo changes.
- Advanced methods: some recent research integrates neural networks or digital twins to improve accuracy and adaptiveness (source: recent 2023–2024 research papers).
Practical example: building a basic 4DOF arm with Arduino
Here’s a high-level build workflow used by many hobbyists:
- Choose a kit or design: pick an acrylic model or buy an all-in-one kit.
- Select servos: torque depends on arm length and payload, typical hobby servos for small arms range from 10–25 kg·cm.
- Mount servos and assemble the links.
- Wire the servos to a PWM controller (e.g., PCA9685) and the controller to an Arduino or Raspberry Pi.
- Upload basic code to move joints and calibrate limits.
- Implement inverse kinematics code or use an IK library to move the end effector to specified coordinates.
Many hobbyist kits include example code and wiring diagrams that speed up the learning curve (source: popular hobbyist kit documentation).
Design tips and common pitfalls
- Power management: don’t run multiple high-torque servos from the Arduino 5V pin — use a dedicated power supply and common ground.
- Mechanical stiffness: flexible links or weak mounts lead to poor repeatability.
- Payload vs. reach trade-off: longer arms reduce the available payload for the same motors.
- Joint limits and collision checking: always code safe joint ranges and test with the arm unloaded.
Real-world example: research and education
In recent years, academic teams have explored using 4DOF arms for rapid prototyping and as platforms for control research. For example, a 2023–2024 trend combines 4DOF arms with digital twins and neural-network controllers to speed up calibration and adapt to wear (source: recent robotics papers). These studies show that even low-DOF arms are useful research tools because they keep the hardware simple while allowing experimentation with advanced control layers.
Where to buy or source components
Options range from complete kits to individual parts:
- Complete kits: great for beginners; they typically include servos, mounts, and example code.
- Modular kits: let you upgrade servos or frames as you grow.
Look for community-backed kits with good documentation; they reduce setup friction and provide sample projects for learning.
How to progress after your first 4DOF arm
Once comfortable, consider:
- Adding sensors: cameras, force sensors, or encoders for feedback and perception.
- Upgrading control: move from Arduino to ROS (Robot Operating System) on Raspberry Pi for advanced topics.
- Exploring collaborative tasks: integrate simple machine vision for object detection and pick-and-place automation.
Conclusion: key takeaways and next steps
A 4DOF robotic arm provides a practical, approachable platform to learn robotics fundamentals: kinematics, control, mechanical design, and software integration. It’s widely used in education and hobbyist projects and even appears in research that pairs simple hardware with advanced control algorithms (source: IEEE and recent robotics literature).
If you’re starting, pick a well-documented kit, focus on stable power and mechanical rigidity, and implement a basic inverse kinematics routine to make the arm move to Cartesian targets. From there, you can add sensors, improve control loops, or migrate to ROS for larger projects.
Further resources: search for Arduino-based 4DOF tutorials, open-source arm kits, and recent papers about digital twin and NN-enhanced control for more advanced ideas.